이번 포스팅 주제는 Activity를 분할하여 구성할 수 있는 Fragment에 대한 것이다.
보통 Activity를 구현하면 하나의 레이아웃 파일에 화면을 구성한다. 만약 화면이 다른 구성으로 동적으로 변화해야 한다거나 구성이 다양하다거나 하는 경우 복잡한 레이아웃을 가질 수 있다.
이런 경우 Fragment로 화면을 분할하여 구성하여 복잡도를 낮추면서 다른 Activity에서 재활용까지 할 수 있다.
이번 주제에서는 프래그먼트 세 개를 교체하는 액티비티를 구현 해 보겠다.
- activity_main.xml 작성
<?xml version="1.0" encoding="utf-8"?>
<androidx.constraintlayout.widget.ConstraintLayout xmlns:android="http://schemas.android.com/apk/res/android"
    xmlns:app="http://schemas.android.com/apk/res-auto"
    xmlns:tools="http://schemas.android.com/tools"
    android:layout_width="match_parent"
    android:layout_height="match_parent"
    android:padding="16dp"
    tools:context=".MainActivity">

    <Button
        android:layout_width="0dp"
        android:layout_height="wrap_content"
        android:id="@+id/bt_frag_one"
        android:text="ONE"
        app:layout_constraintLeft_toLeftOf="parent"
        app:layout_constraintTop_toTopOf="parent"
        app:layout_constraintRight_toLeftOf="@id/bt_frag_two"/>

    <Button
        android:layout_width="0dp"
        android:layout_height="wrap_content"
        android:id="@+id/bt_frag_two"
        android:text="TWO"
        app:layout_constraintLeft_toLeftOf="parent"
        app:layout_constraintRight_toRightOf="parent"
        app:layout_constraintTop_toTopOf="parent"
        app:layout_constraintWidth_percent="0.33"/>

    <Button
        android:layout_width="0dp"
        android:layout_height="wrap_content"
        android:id="@+id/bt_frag_three"
        android:text="THREE"
        app:layout_constraintRight_toRightOf="parent"
        app:layout_constraintTop_toTopOf="parent"
        app:layout_constraintLeft_toRightOf="@id/bt_frag_two"/>

    <FrameLayout
        android:layout_width="0dp"
        android:layout_height="0dp"
        android:id="@+id/fl_frag_container"
        android:layout_marginTop="16dp"
        app:layout_constraintLeft_toLeftOf="parent"
        app:layout_constraintRight_toRightOf="parent"
        app:layout_constraintBottom_toBottomOf="parent"
        app:layout_constraintTop_toBottomOf="@+id/bt_frag_two"/>

</androidx.constraintlayout.widget.ConstraintLayout>
ConstraintLayout을 활용하여 Activity의 상단에 세 개의 버튼을 나란히 두고 그 아래에 Fragment를 담을 컨테이너로 FrameLayout을 두었다. 복잡한 것은 없으니 xml을 참고한다.
- Fragment를 위한 Layout 작성
세 개의 Fragment를 위한 Layout 파일을 frag_one, frag_two, frag_three로 생성한다.
내부는 간단하게 TextView 하나를 두고 각각 다른 Background Color를 지정하여 구분할 것이다.
<?xml version="1.0" encoding="utf-8"?>
<LinearLayout xmlns:android="http://schemas.android.com/apk/res/android"
    android:orientation="vertical"
    android:layout_width="match_parent"
    android:layout_height="match_parent"
    android:background="#FF0000">

    <TextView
        android:layout_width="match_parent"
        android:layout_height="match_parent"
        android:id="@+id/tv_in_frag_one"
        android:text="Fragment one!!"
        android:gravity="center"
        android:textSize="20sp"/>

</LinearLayout>
위와 같은 파일을 세 개 만들어서 텍스트와 배경색을 구분 해 주자.
- Fragment Class 생성
Fragment 클래스를 상속받는 OneFragment, TwoFragment, ThreeFragment 를 작성하자.
오버라이드 해야 할 메서드들이 여럿 있지만, onCreateView 만 오버라이드 하여 레이아웃과 연결시켜 주자.
class OneFragment : Fragment(){

    override fun onCreateView(
        inflater: LayoutInflater,
        container: ViewGroup?,
        savedInstanceState: Bundle?
    ): View? {
        return inflater.inflate(R.layout.frag_one, null)
    }
}
위와 같은 클래스를 세 개 작성하고, inflater.inflate의 첫 번째 인자인 레이아웃의 id를 변경 해 주도록한다.
- Activity에서 Fragment 호출
class MainActivity : AppCompatActivity() {

    private lateinit var fragmentOne: OneFragment
    private lateinit var fragmentTwo: TwoFragment
    private lateinit var fragmentThree: ThreeFragment

    override fun onCreate(savedInstanceState: Bundle?) {
        super.onCreate(savedInstanceState)
        setContentView(R.layout.activity_main)

        initFragments()
        initButtons()

    }

    private fun initFragments() {
        fragmentOne = OneFragment()
        fragmentTwo = TwoFragment()
        fragmentThree = ThreeFragment()
        commitFragment(fragmentOne)
    }

    private fun initButtons() {
        bt_frag_one.setOnClickListener {
            commitFragment(fragmentOne)
        }

        bt_frag_two.setOnClickListener {
            commitFragment(fragmentTwo)
        }

        bt_frag_three.setOnClickListener {
            commitFragment(fragmentThree)
        }
    }

    private fun commitFragment(fragment: Fragment) {
        supportFragmentManager.beginTransaction()
            .replace(R.id.fl_frag_container, fragment)
            .commit()
    }
}
initFragments 메서드에서 Fragment들을 생성한다. 이때 oneFragment를 생성과 동시에 commitFragment에 전달하여 첫 번째로 화면에 보이게 한다.
initButtons 메서드에서 각 버튼을 누르면 commitFragment에 맞는 Fragment를 전달하여 교체되도록 한다.
- 실행 결과
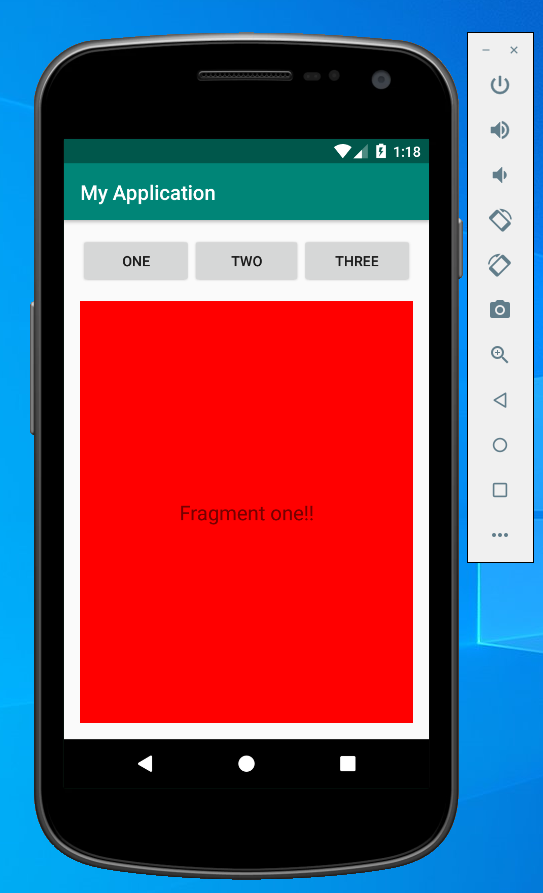
지금까지 작성한 코드를 시뮬레이터를 통해 실행하면 위와 같은 화면이 나타난다. 그리고 각 버튼을 누르면 Fragment들이 변경되는 것을 확인할 수 있다.
- 다음 할 일
다음으로는 위 코드를 수정하여 Activity에 여러 Fragment들을 동시에 띄워보고 Activity와 Fragment간의 통신을 해 보도록 하겠다.
'개발 > Android' 카테고리의 다른 글
| [Android] Fragment로 Activity 구성 및 통신 - 3 (0) | 2020.05.24 |
|---|---|
| [Android] Fragment로 Activity 구성 및 통신 - 2 (4) | 2020.05.23 |
| [Android] Kotlin + MVVM + AAC 로 Todo 앱 만들기 - 5 (8) | 2020.03.08 |
| [Android] Kotlin + MVVM + AAC 로 Todo 앱 만들기 - 4 (0) | 2020.03.01 |
| [Android] Kotlin + MVVM + AAC 로 Todo 앱 만들기 - 3 (0) | 2020.02.29 |

