저번 포스팅에 이어, Activity에 세 개의 Fragment를 띄울 것이다.
컨셉은 간단한 펫샵으로 해 보겠다. 각 Fragment는 버튼을 가지고 있고 그 버튼을 누르면 Fragment에 해당하는 애완동물이 판매되었음을 액티비티에 알린다. 그리고 액티비티는 각 애완동물이 판매된 수를 텍스트뷰로 보여주도록 하겠다.
- activity_main.xml 수정
<?xml version="1.0" encoding="utf-8"?>
<androidx.constraintlayout.widget.ConstraintLayout xmlns:android="http://schemas.android.com/apk/res/android"
    xmlns:app="http://schemas.android.com/apk/res-auto"
    xmlns:tools="http://schemas.android.com/tools"
    android:layout_width="match_parent"
    android:layout_height="match_parent"
    android:padding="16dp"
    tools:context=".MainActivity">

    <TextView
        android:layout_width="0dp"
        android:layout_height="wrap_content"
        android:id="@+id/tv_pet_count"
        app:layout_constraintLeft_toLeftOf="parent"
        app:layout_constraintRight_toRightOf="parent"
        app:layout_constraintTop_toTopOf="parent"
        app:layout_constraintBottom_toTopOf="@+id/fl_frag_dog"
        app:layout_constraintVertical_chainStyle="spread"/>

    <FrameLayout
        android:layout_width="0dp"
        android:layout_height="0dp"
        android:id="@+id/fl_frag_dog"
        app:layout_constraintLeft_toLeftOf="parent"
        app:layout_constraintRight_toRightOf="parent"
        app:layout_constraintTop_toBottomOf="@+id/tv_pet_count"
        app:layout_constraintBottom_toTopOf="@+id/fl_frag_cat"
        app:layout_constraintVertical_chainStyle="spread"/>

    <FrameLayout
        android:layout_width="0dp"
        android:layout_height="0dp"
        android:id="@+id/fl_frag_cat"
        app:layout_constraintLeft_toLeftOf="parent"
        app:layout_constraintRight_toRightOf="parent"
        app:layout_constraintTop_toBottomOf="@+id/fl_frag_dog"
        app:layout_constraintBottom_toTopOf="@+id/fl_frag_rabbit"
        app:layout_constraintVertical_chainStyle="spread"/>

    <FrameLayout
        android:layout_width="0dp"
        android:layout_height="0dp"
        android:id="@+id/fl_frag_rabbit"
        app:layout_constraintLeft_toLeftOf="parent"
        app:layout_constraintRight_toRightOf="parent"
        app:layout_constraintTop_toBottomOf="@+id/fl_frag_cat"
        app:layout_constraintBottom_toBottomOf="parent"
        app:layout_constraintVertical_chainStyle="spread"/>

</androidx.constraintlayout.widget.ConstraintLayout>
TextView 1개, FrameLayout 3개로 구성하였다.
펫은 강아지, 고양이, 토끼 로 구분하였다. 제약조건은 본인의 취향에 따라 수정하도록 한다.
이 포스팅은 서로 연결되도록 하였고 "layout_constraintVertical_chainStyle="spread" 를 사용하였다. ConstraintLayout의 제약조건에 대해서는 깊게 다루지 않겠다. (나도 잘 모른다..!)
- Fragment의 Layout 수정
<?xml version="1.0" encoding="utf-8"?>
<androidx.constraintlayout.widget.ConstraintLayout
    xmlns:android="http://schemas.android.com/apk/res/android"
    xmlns:app="http://schemas.android.com/apk/res-auto"
    android:orientation="vertical"
    android:layout_width="match_parent"
    android:layout_height="match_parent"
    android:padding="8dp">

    <ImageView
        android:layout_width="0dp"
        android:layout_height="0dp"
        android:id="@+id/iv_cat"
        android:src="@drawable/cat"
        app:layout_constraintLeft_toLeftOf="parent"
        app:layout_constraintTop_toTopOf="parent"
        app:layout_constraintBottom_toBottomOf="parent"
        app:layout_constraintWidth_percent="0.2"
        app:layout_constraintDimensionRatio="1:1"/>

    <Button
        android:layout_width="0dp"
        android:layout_height="wrap_content"
        android:id="@+id/bt_cat"
        android:text="고양이"
        android:layout_marginStart="16dp"
        app:layout_constraintLeft_toRightOf="@+id/iv_cat"
        app:layout_constraintRight_toRightOf="parent"
        app:layout_constraintTop_toTopOf="parent"
        app:layout_constraintBottom_toBottomOf="parent"/>

</androidx.constraintlayout.widget.ConstraintLayout>
Fragment들의 레이아웃은 위와 같은 형태로 세 개를 작성하였다. 심심하지 않게 ImageView를 추가하고 구글에서 무료 아이콘을 구하여 추가하였다.
- Fragment Class 이름 수정
이 전에 OneFragment, TwoFragment, ThreeFragment 로 되어 있던 것을 DogFragment, CatFragment, RabbitFragment로 수정한다.
- MainActivity 수정
package com.android.sample.fragment

import androidx.appcompat.app.AppCompatActivity
import android.os.Bundle
import androidx.fragment.app.Fragment
import kotlinx.android.synthetic.main.activity_main.*

class MainActivity : AppCompatActivity() {

    private lateinit var dogFragment: DogFragment
    private lateinit var rabbitFragment: RabbitFragment
    private lateinit var catFragment: CatFragment

    private var dogCount: Int = 0
    private var catCount: Int = 0
    private var rabbitCount: Int = 0

    override fun onCreate(savedInstanceState: Bundle?) {
        super.onCreate(savedInstanceState)
        setContentView(R.layout.activity_main)

        initPetCountView()
        initFragments()
    }

    private fun initPetCountView() {
        tv_pet_count.text = petCountToString()
    }

    private fun petCountToString() : String {
        return "강아지 : $dogCount\n" +
                "고양이 : $catCount\n" +
                "토끼 : $rabbitCount"
    }

    private fun initFragments() {
        dogFragment = DogFragment().also {
            commitFragment(it, R.id.fl_frag_dog)
        }

        catFragment = CatFragment().also {
            commitFragment(it, R.id.fl_frag_cat)
        }

        rabbitFragment = RabbitFragment().also {
            commitFragment(it, R.id.fl_frag_rabbit)
        }
    }

    private fun commitFragment(fragment: Fragment, containerResId: Int) {
        supportFragmentManager.beginTransaction()
            .replace(containerResId, fragment)
            .commit()
    }
}
이름이 변경된 Fragment들을 수정하고 판매된 강아지, 고양이, 토끼를 저장할 변수들을 선언하였다.
그리고 판매된 펫 수를 출력하는 TextView를 위한 함수, Fragment들을 위한 함수를 작성하였다.
commitFragment 함수에 Fragment와 그 Fragment를 위치시킬 레이아웃의 id를 전달하도록 수정하였다.
실행하면 아래와 같은 화면이 나온다.
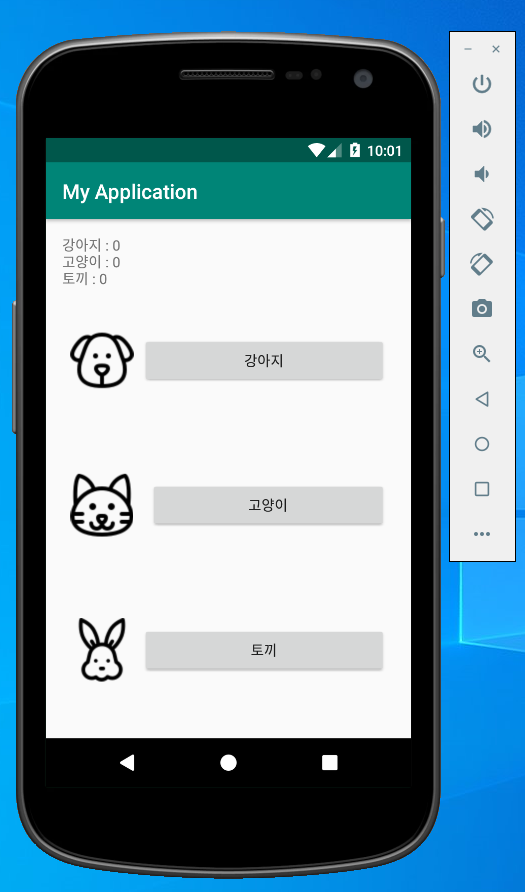
다소 허접한 모습이지만, 튜토리얼 느낌의 예제이므로 그러려니 하자.
이제 Fragment의 각 버튼을 누르면 MainActivity에서 감지하여 펫의 카운트를 증가시키고 TextView를 업데이트 하도록 코드를 작성 해 보자.
이번 포스팅은 인터페이스를 활용하겠다.
- PetType Enum class
enum class PetType {
    Dog, Cat, Rabbit
}
PetType를 표현하는 Enum 클래스를 하나 생성하였다. Dog, Cat, Rabbit 세 가지이다.
- Event listener를 위한 Interface 작성
interface OnPetEventListener {
    fun onPetPurchase(type: PetType)
}
Pet과 관련된 Event listener를 위한 Interface를 작성하였다. 현재는 버튼을 클릭하여 펫을 구매했다는 이벤트를 발생시키고 PetType를 전달하는 함수를 구현하도록 되어있다.
이 Interface는 독립적인 클래스 파일을 하나 만들어 작성하였다.
별도로 작업하지 않았다면 하나의 패키지(폴더) 안에 모든 클래스가 있을텐데, 보기 좋게 분리하는 것도 좋다.
나 같은 경우는 Interface는 "event" 라는 폴더에, Activity, Fragment는 "view" 폴더를 만들고 그 안에 "activity"와 "fragment"를 만들었고, PetType은 "data" 폴더를 만들어서 분리 해 주었다.
- Fragment 수정
class DogFragment : Fragment(){

    var listener: OnPetEventListener? = null

    override fun onCreateView(
        inflater: LayoutInflater,
        container: ViewGroup?,
        savedInstanceState: Bundle?
    ): View? {
        return inflater.inflate(R.layout.frag_dog, null).apply {
            bt_dog.setOnClickListener {
                listener?.onPetPurchase(PetType.Dog)
            }
        }
    }
}
각 Fragment에 OnPetEventListener 객체를 옵셔널로 생성하고 null로 만들어 준다.
그리고 Fragment에 존재하는 버튼에 setOnClickListener를 통해 버튼을 누르면 listener의 onPetPurchase를 호출하고 Fragment에 맞는 PetType을 전달하도록 구현한다. 다른 Fragment도 동일한 방법으로 구현한다.
- MainActivity 수정
class MainActivity : AppCompatActivity(), OnPetEventListener {
	...

    override fun onCreate(savedInstanceState: Bundle?) {
        super.onCreate(savedInstanceState)
        setContentView(R.layout.activity_main)

        initFragments()
        updatePetCount()
    }

    private fun initFragments() {
        dogFragment = DogFragment().apply {
            this.listener = this@MainActivity
        }

        catFragment = CatFragment().apply {
            this.listener = this@MainActivity
        }

        rabbitFragment = RabbitFragment().apply {
            this.listener = this@MainActivity
        }

        commitFragment(dogFragment, R.id.fl_frag_dog)
        commitFragment(catFragment, R.id.fl_frag_cat)
        commitFragment(rabbitFragment, R.id.fl_frag_rabbit)
    }

	...

    override fun onPetPurchase(type: PetType) {
        when(type) {
            PetType.Dog -> dogCount += 1
            PetType.Cat -> catCount += 1
            PetType.Rabbit -> rabbitCount += 1
        }
        updatePetCount()
    }

    private fun updatePetCount() {
        tv_pet_count.text = petCountToString()
    }

    private fun petCountToString() : String {
        return "강아지 : $dogCount\n" +
                "고양이 : $catCount\n" +
                "토끼 : $rabbitCount"
    }
}
MainAcitivty는 OnPetEventListener를 구현하도록 하여 onPetPurchase 메서드를 override한다.
onPetPurchase가 호출되면 넘어온 PetType에 따라 카운트를 증가시키고 TextView를 업데이트 하는 함수를 호출한다.
initPetCountView와 기능이 동일하지만 의미가 다르기에 함수명을 변경하였다.
또한 initFragments 메서드도 also 메서드를 사용하던 것을 apply 메서드를 사용하는 것으로 변경하였다.
여기까지 코드를 작성하고 실행하면 아래와 같다.
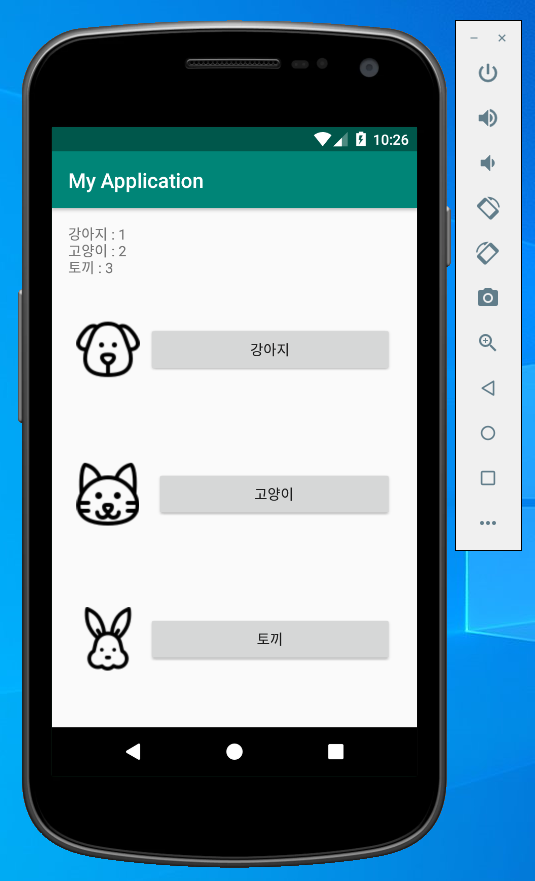
각각의 버튼을 누르면 TextView가 변경하는 것을 확인할 수 있다.
- 다음 할 일
이번 포스팅에서 작성한 Interface를 활용하여 Activity와 Fragment의 통신하는 것은 Google에서 가이드하고 있는 좋은 방법이지만 오래된 방법이다.
이 방법 외에 활용할 수 있는 것은 다양하지만, 다음 포스팅은 EventBus와 ViewModel을 활용하는 방법을 소개 할 것이다.
'개발 > Android' 카테고리의 다른 글
| [Android] MVVM + AAC + Coroutine + Retrofit + Github API 예제 (5) | 2020.07.13 |
|---|---|
| [Android] Fragment로 Activity 구성 및 통신 - 3 (0) | 2020.05.24 |
| [Android] Fragment로 Activity 구성 및 통신 - 1 (0) | 2020.05.11 |
| [Android] Kotlin + MVVM + AAC 로 Todo 앱 만들기 - 5 (8) | 2020.03.08 |
| [Android] Kotlin + MVVM + AAC 로 Todo 앱 만들기 - 4 (0) | 2020.03.01 |


